Yes! it IS easy to sculpt a monster!
The everyday life of a Hero, apart from bearing a whimsical weather without a moan, consists in triumphing over monsters, often deformed besides being hostile. No real adventure without a monster for the final scene (What? No dragon? Your adventure sucks, DM!). I kind of like this. So let’s add one more monster to the list (Don’t like heroes so much anyway).
Starters…
Let’s begin with a little dictionary check:
” Monster: n.m. (Lat. Monstrum) 1. Sc. of V. live being presenting an important deformation. The study of monsters is the teratology. 2. Fantastic creature of the mythology, the legends. 3. Animal, object frightening by its size, its aspect. Marine monsters. 4. Person of a disgusting ugliness. 5. A. Someone who arouses the horror by its cruelty, its perversity. B. Someone who frightens or arouses profound antipathy by some defect, some vice which he/she presents to an extreme degree. ” (Larousse dictionary in 1991).
A whole program: deformed, ugly and nasty. My monster shall be all of this. Plus, I’ll add it another quality I love so much with monsters: it will be stupid, stupid as a hen, stupid as a shadok. (For those of you who missed this wonderful series (poor of you), I order you to find it and watch it repeatedly).
The importance of documentation
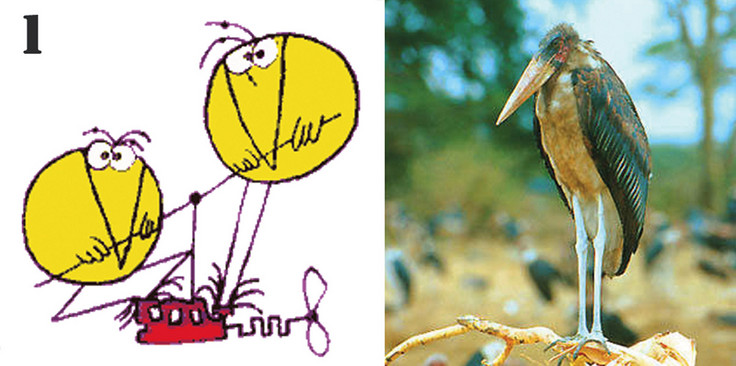
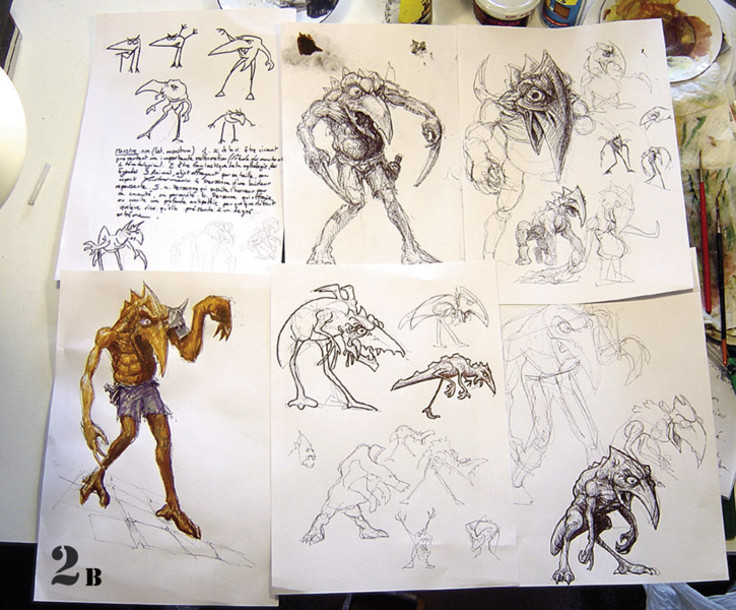
As we can notice (1), the shadok does not look too smart; the marabout, an african bird who probably was its model, does not either. With such data, we rush into intense graphic researches (2b) to make a creature which will cause at least a little fear, then a miniature.
Research
The monster being a deformed creature, we don’t want it to look too much like a humanoid or a bird, even a dinosaur, but rather a little of all this at the same time.
The most complicated part is to give it a frightening aspect: he must be deformed without being sick, ugly without being (too) ridiculous. It must look mean, and capable of hurting whoever it wants: to endow it with spikes, claws and other fangs is a good means, not to forget muscles: muscles are very useful, to give big slaps. It will anyway look stupid, as was planned.
We finally obtain a drawing roughly presenting the main characteristics of the creature (2): the aspect, the proportions and the measurements; for the rest we shall improvise in the course of sculpture.
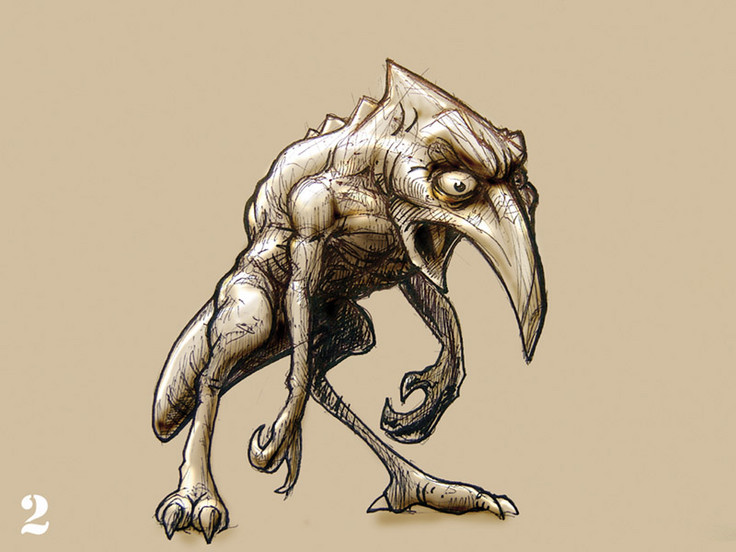
Some people will prefer to push the preparation farther by redrawing the animal in an ideal position and by polishing up details, I prefer to dash at once into the conception of the armature.
Armature
My monster will be all muscles, I thus decide to use mainly FIMO clay to build it, so I’ll have the time to work the muscle structure and the skin details without being pressed by any sort of drying time. I prepare in advance enough of my special blend of FIMO (Soft Dolphin Grey 60 % + Classic Chlorophylle 30 % + Mixquick 10 %). A rather supple dough, of an average, neutral and very readable green, to allow an easy blending of the additions on the model. Yet it’s hard enough not to deform completely under the pressure of tools (as pure Soft would)There’s also little enough Mixquick so the clay remains opaque in the fine details. This is experimental, we shall see if it works. Every sculptor will eventually have his most beloved clay, I hope this one is right for me.
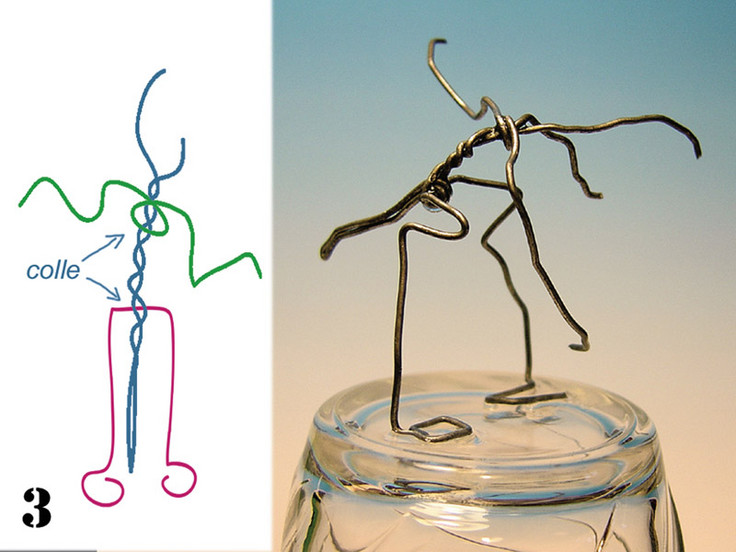
The wire armature (3) consists of three parts (see plan) which at first will be assembled on the same plane, out of concern for symmetry. The lower end of the legs has a bend, to help glue the model to its working base, then, unbent, when it is finished, to its definitive base. The group “tail+spine+head” is twisted around the groin and bonded with a drop of superglue, as well as the arms, which make a loop around the spine.
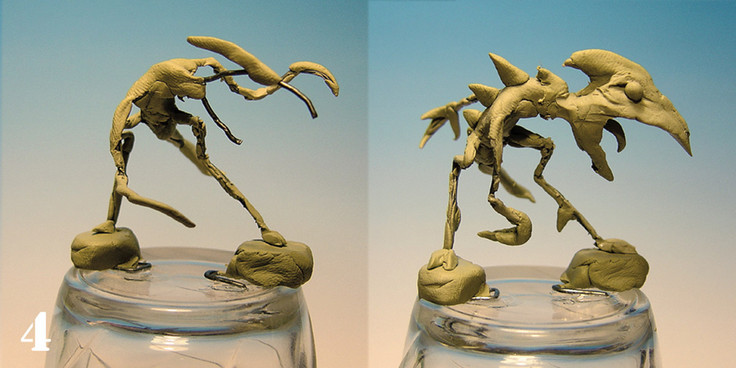
This armature is then glued on a stable and heatproof support (glass, cork, or one made of FIMO). Then we give it its final position. It is then frequent for the glue bond to break, just glue it again. We add various additional parts made of milliput (4), to strengthen the junctions between the parts of the armature, and wherever the final model will have hard edges.
It is still possible at this stage to modify the position of the model, with a few twists, breaks and points of glue. It is the case here, the position of the arms became definitive only at the end of this stage.
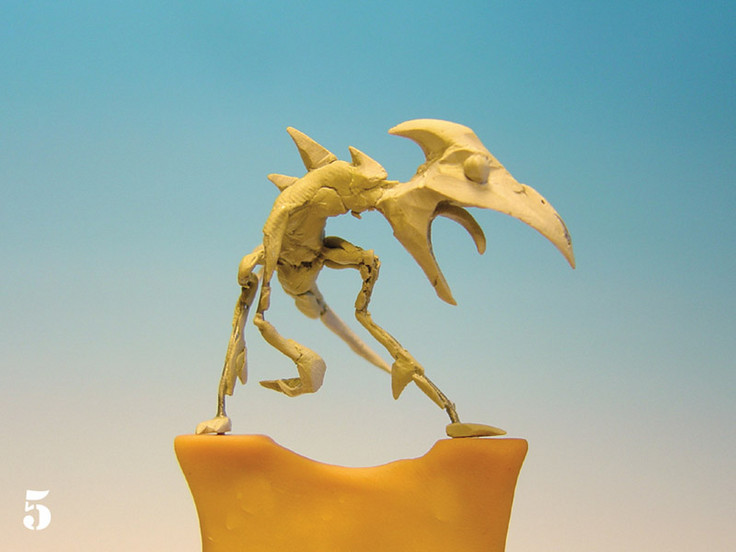
All these edges are then cut and sanded until they correspond to the edges of the final model (5). There’s lots of clay to be added, it is thus essential that the armature at this stage remains very thin, so that it does cause problems later. Do not hesitate to be heavy-handed with the cutter, to keep only the indispensable. We can see on the photo that two round balls were added for the eyes, on each side of the head, to make sure they will be symmetric. The mini is in a “perfectly impossible to mold” position, this is deliberate, that’s what makes the charm of unique works. I decided at this stage to change support. The glass was very horizontal, useful to find the good position, but too wide to allow access to all the zones of the model. I thus made an adapted support in FIMO. The model is planted in it by the stalks of the armature, which will also serve to fix it to its final base.
Modelling
It is now time to begin modelling. It is better to plan a big working session for the first stage, which cannot be interrupted.
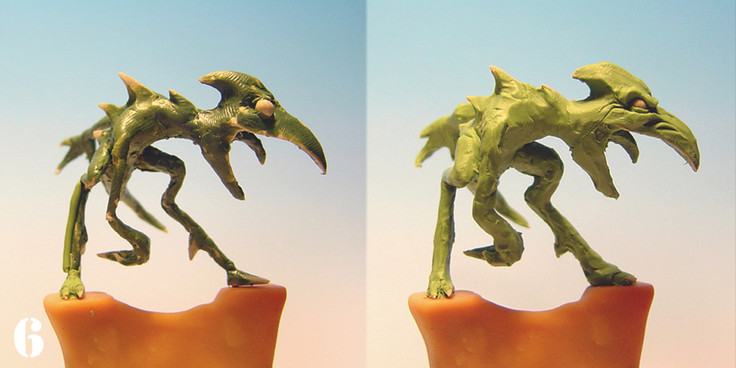
Fresh FIMO only adheres on itself, so I’ll have to trick it into sticking on my armature. Several methods exist: the first one, praying, went out of use since the invention of two others: superglue and duro (stuff Green for the British). The superglue allows to stick effectively the FIMO on its armature, but tends to gowhere it wants. Very annoying. I chose the other one: spread a thin layer of duro over all the armature (this thing was an industrial glue at a time, and seems to remember it) and before it sets cover it with FIMO with a flat tool (6). Duro has the peculiarity to adhere very well to FIMO.
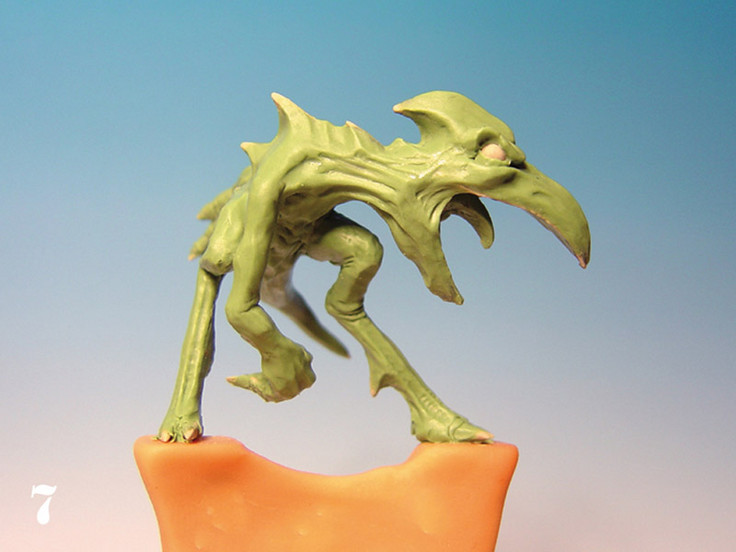
During this operation, we begin to roughly form the first masses of the mini, without adding too much, not to waste time. The main work is to make sure that a symmetry is respected, and that opposite members are of the same length. You can use clay shapers of various forms and hardness (I prefer cones) to make particular forms, and to ease the smoothing. A harder tool allows you to exercise rough pressures, perfect to add clay, modify heavily the masses or blend two parts, a more flexible tool will allow you to apply more subtle pressures, smoothing textureswithout modifying the volumes. I then chose to smooth all the model with a wet brush (7), it is not indispensable but it gives a clearer vision, and already eliminates part of the harshness which we shall anyway have to smooth before the end. Once this step is completed, the actual sculpture work can begin.
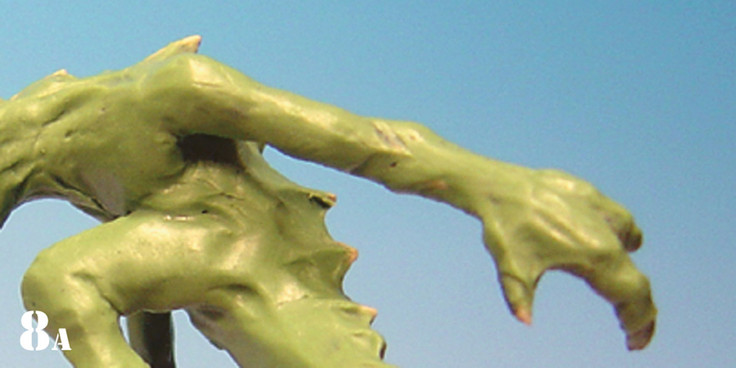
First I work on the most remote and hidden zones, like the torso, the neck and the inside of the hands, then I build member after member, one leg and the other, back and tail and then the arms(8a).
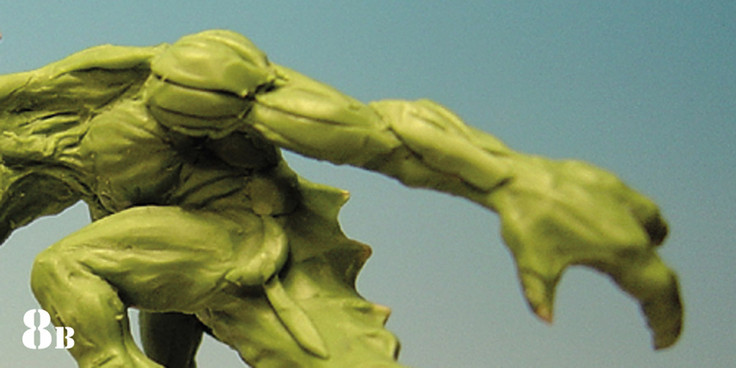
On each member, I put all the masses at once, to see where I’m going. A cylinder of clay is cut in several parts, which are rounded and stuck in position where the muscles will be (8b).
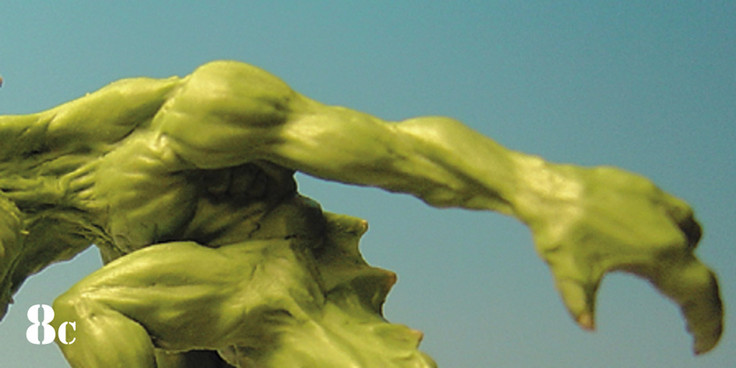
I fix them with a harder tool, then smooth them on with a cone clay-shaper and a wet brush (8c).
The small details and the texture will be then shaped, with a triangular or conical clay-shaper. For the “legs” I refer to a book about african animals, and copy the legs of an ostrich, particularly the toes and shape of thearticulations. Thighs, trunk and arms are nothing else than a modified human anatomy. A book about anatomy will show you where muscles are attached (there are lots of such books, find your favorite), adapt them according to the deformations of the skeleton. There are good examples of hypertrophied muscle structure in body-building magazines. An indispensable purchase for who cares about realism. At this stage, the main thing is to build all the masses of the model before going too far in details. You might need to work again on a part already treated to correct the balance of the model.
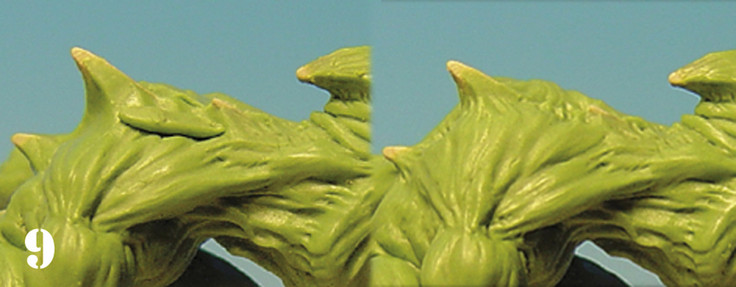
It has a big head, so I don’t hesitate to add back muscles so he can bear it (9), and thicken his counter-weight tail. The tail muscles are somehow the continuation of the torso and back ones, crossed on the sides.
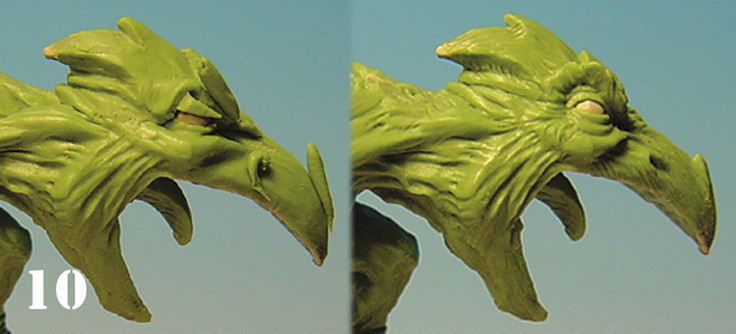
The creature’s mouth, as a focal point, deserves greater attention. I put smaller strings of clay above the eyes, on the cheekbones, tip of the beak, nostrils and eyelids(10).
I work on both sides at the same time, to make sure the masses are the same. I then smooth them with a triangular clay-shaper, which I will also use to shape the folds and wrinkles surrounding the eyes.
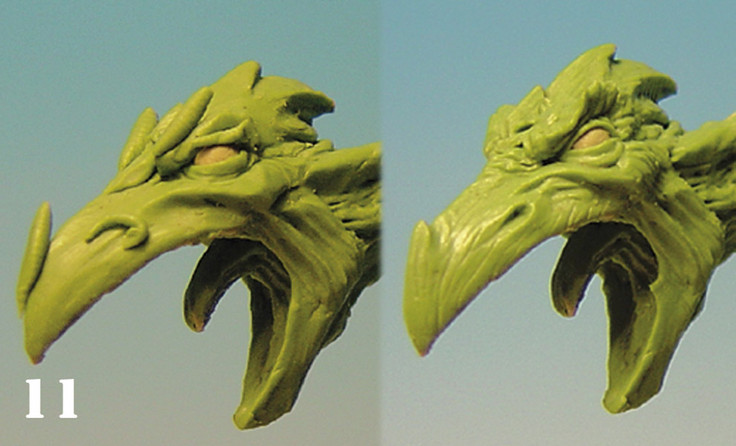
For the beak I copy marabout’s photos found on internet. My anatomy book indicates me the anchoring of muscles and tendons on a human face, I adapt. I do not hesitate to make it frown excessively, it has to look mean, and it is in the eyes that it will show (11).
I regularly check symmetry by looking at the head from below, above, upside down and from behind. For the realism of the expression, a ggod trick is to watch yourself in front of a mirror, to see how the masses of your face move, following the expression. Even if it is not what we sculpt here, it is in the human face that we shall find the characteristics of the expression we need (animals are rather blank most of the time). In order not to damage the reputation of miniature enthusiasts around the world, please do this away from the glances of your close relations.
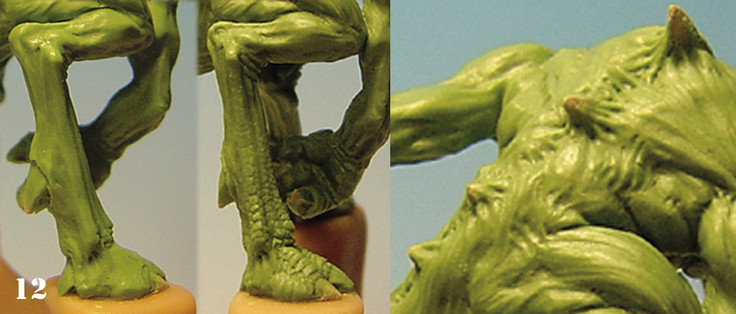
Now that all the masses are correctly shaped, symmetric, and properly stretched depending on the position of the members, we can add the finishing touches. To give a scaly texture to the legs of my creature (12), I use a triangular clay-shaper, and by successive pressures I outline every scale, beginning with the most striking, which are also the biggest. The book on the ostrichs is of a big help to me at this stage. With a hard tool I draw lines in the beak and then smooth them with a clay-shaper. I put on some places (neck, base of the tail, the top of hands) very thin strings of clay that I blend with a clay-shaper to make striking veins (photos of oxes and body-building magazines are recommended).
I work on the texture of the back (12) to give the impression of skin stretched out by backbones. I use a conical clay-shaper: small regular pressions loosen the folds of skin around spikes and in hollows between muscles. The same method can be applied to render sinews at the base of muscles and the muscular texture, without going too far however: in the middle of muscles the skin is sometimes too stretched out to show streaks.
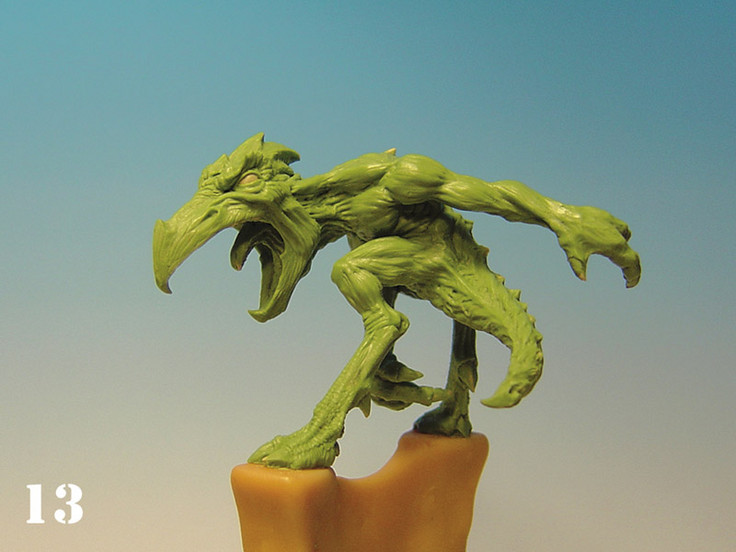
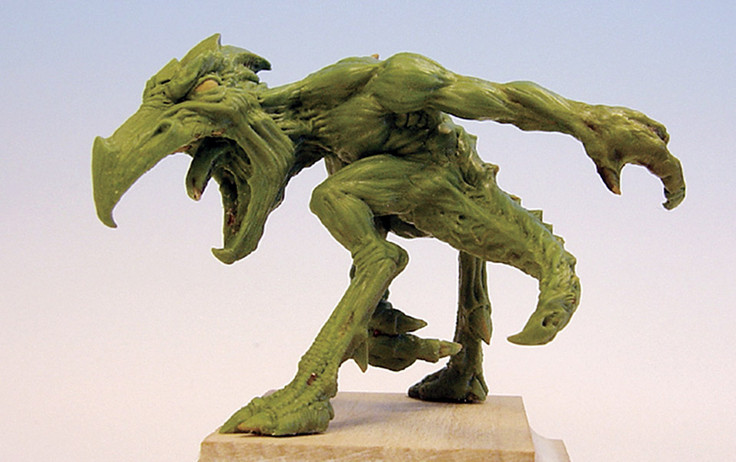
I add a bit of clay to the ends of the beak and to the ends of the claws to make them sharper, and my monster is ready to bake (13).
If I’m not in a rush I let a night come and go, to check the mini one last time the next day with a fresh eye, correct the last imperfections, smooth the detailing job and then : to the oven!
On a stable base, our little chick will stay 35 minutes at 135° Celsius.
When it’s cold I take it off its working base and temporarily put it on its final base.
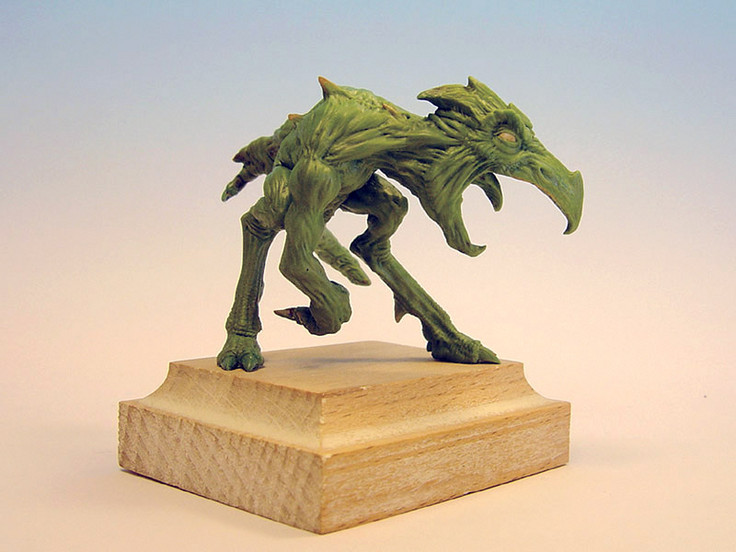
All I have to do now is paint it.
Yet I didn’t think of a color… Chicks are yellow, right?
JAG