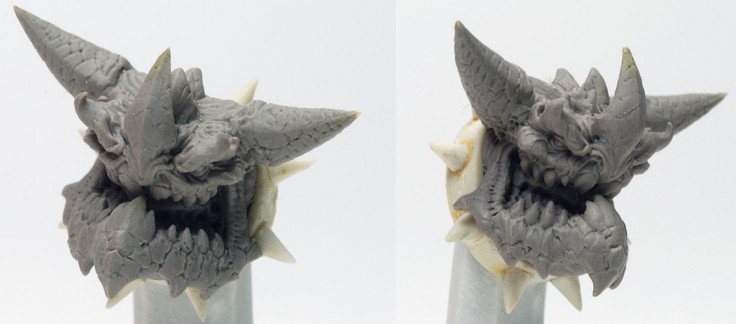
Head of a what? (Roscoe)
Contrary to generally accepted ideas, sculpting a monster head does not simply consist in shaping a ball of clay with two holes for the eyes. You must add two sausages above to make the horns.
Where to begin ?

By the beginning! We must above all know where we’re going and to do this, there’s nothing better than a small drawing. It can come from an illustration in a specialized book, or for the proudest, a personal production.
Once the page is darkened with risky sketches, it’s time to choose. The available time or the difficulty of such or such detail can moderate the dangerous enthusiasm of the rash and foolish. You can also choose the best drawing. Or the worst.
Armature
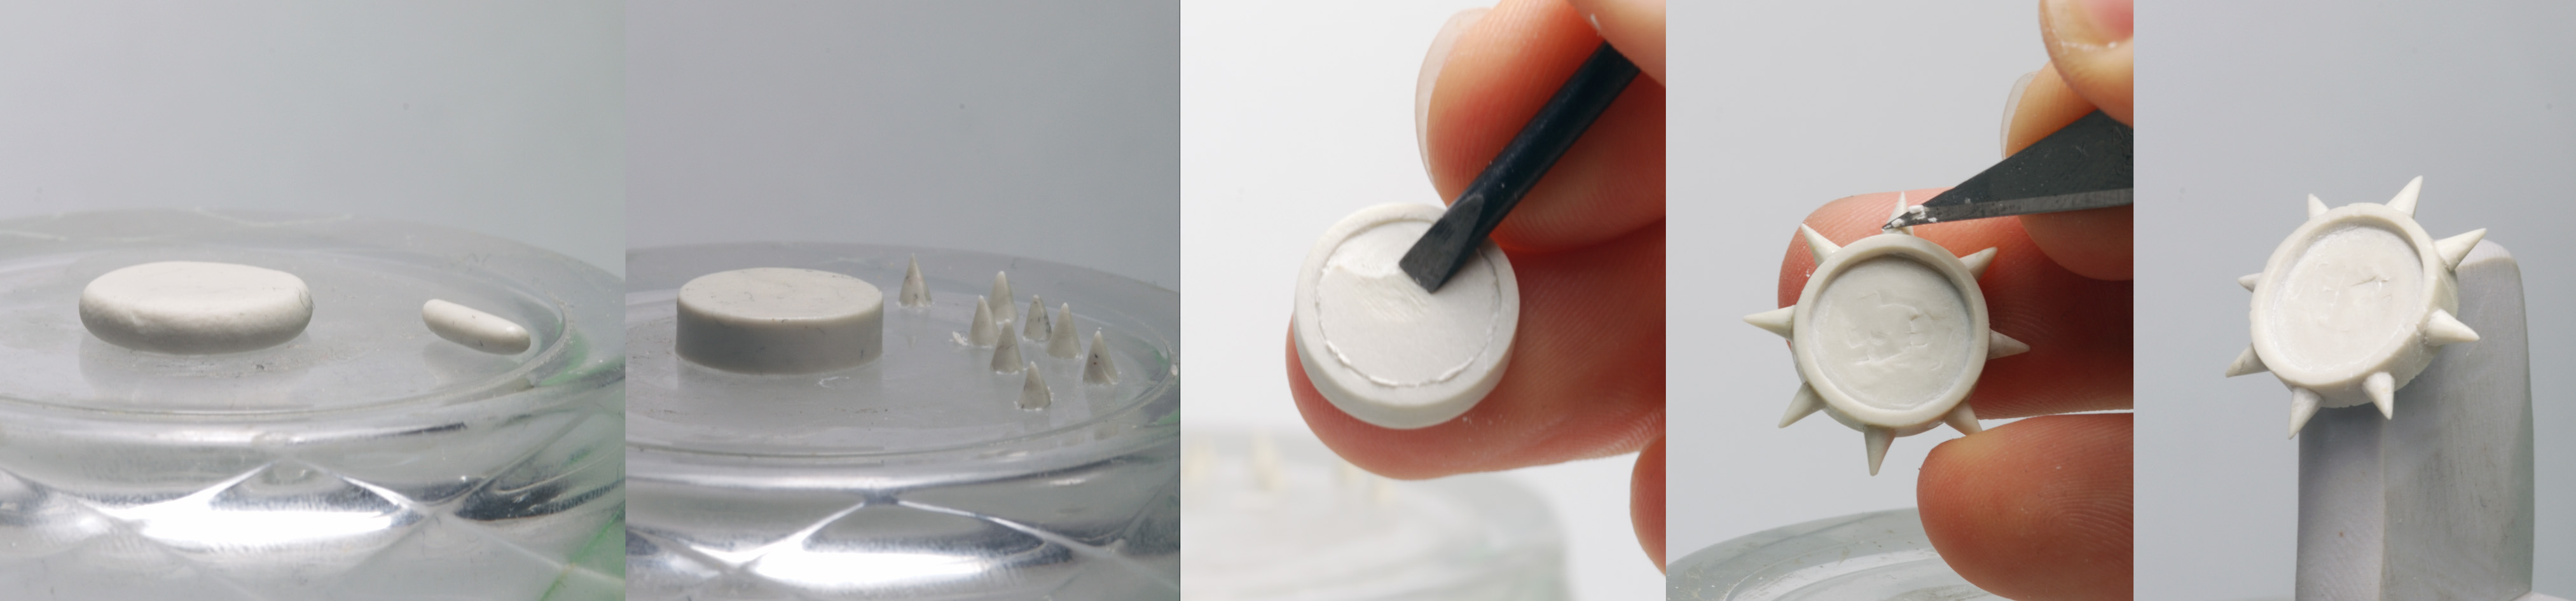
We begin with the collar. We flatten a cylinder of Magic Sculp, then we cut eight small cylinders, which we form in cones with a flat tool. We put them vertically to give them a flat base. After twenty minutes in front of grandma’s toaster, the cylinder is sanded and dug, then we stick the spikes, which we equalize with the scalpel.
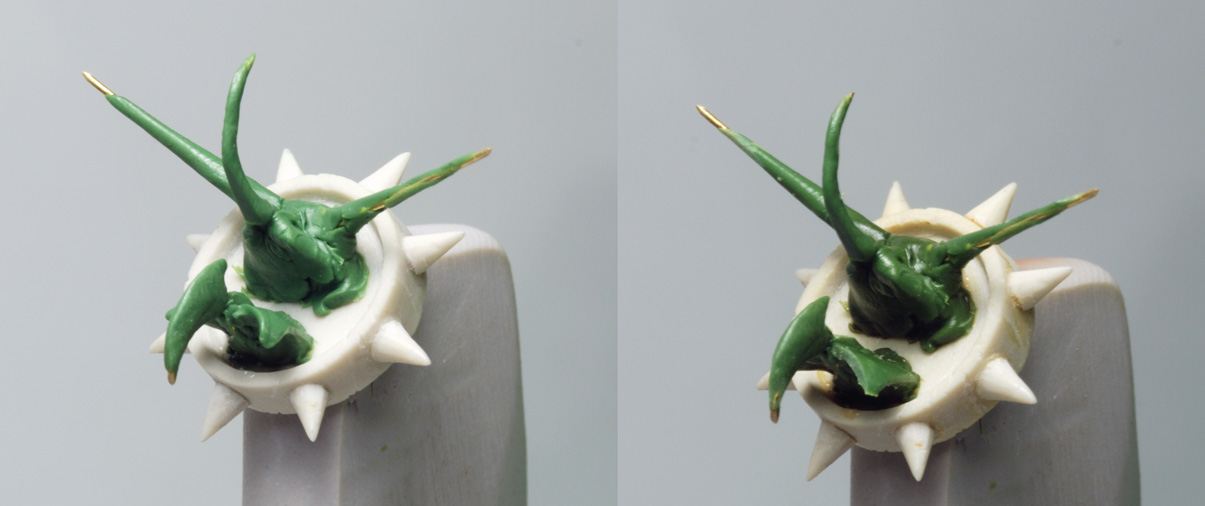
The armature of a human face is rather discreet. On a monster, the merry extravagance of details forces to elaboration. All these sharp spikes are going to need a skeleton. We thus plant brass wire (less resistant than iron, but also more flexible) in the middle of the necklace, who will be the armature of horns and jaw.

We secure the solidity of the assembly with Duro, without adding too much, so as to keep room for the next steps. Once dry, the duro has the advantage to keep a certain flexibility, which permits to avoid breaking the armature in the course of sculpture. The mini returns in front of grandma’s toaster until complete hardening, we refine a little with the scalpel, and the sculpture itself can begin.
Masses
We begin by modelling the main masses, keeping an eye on global shape, with no consideration (yet) for details.
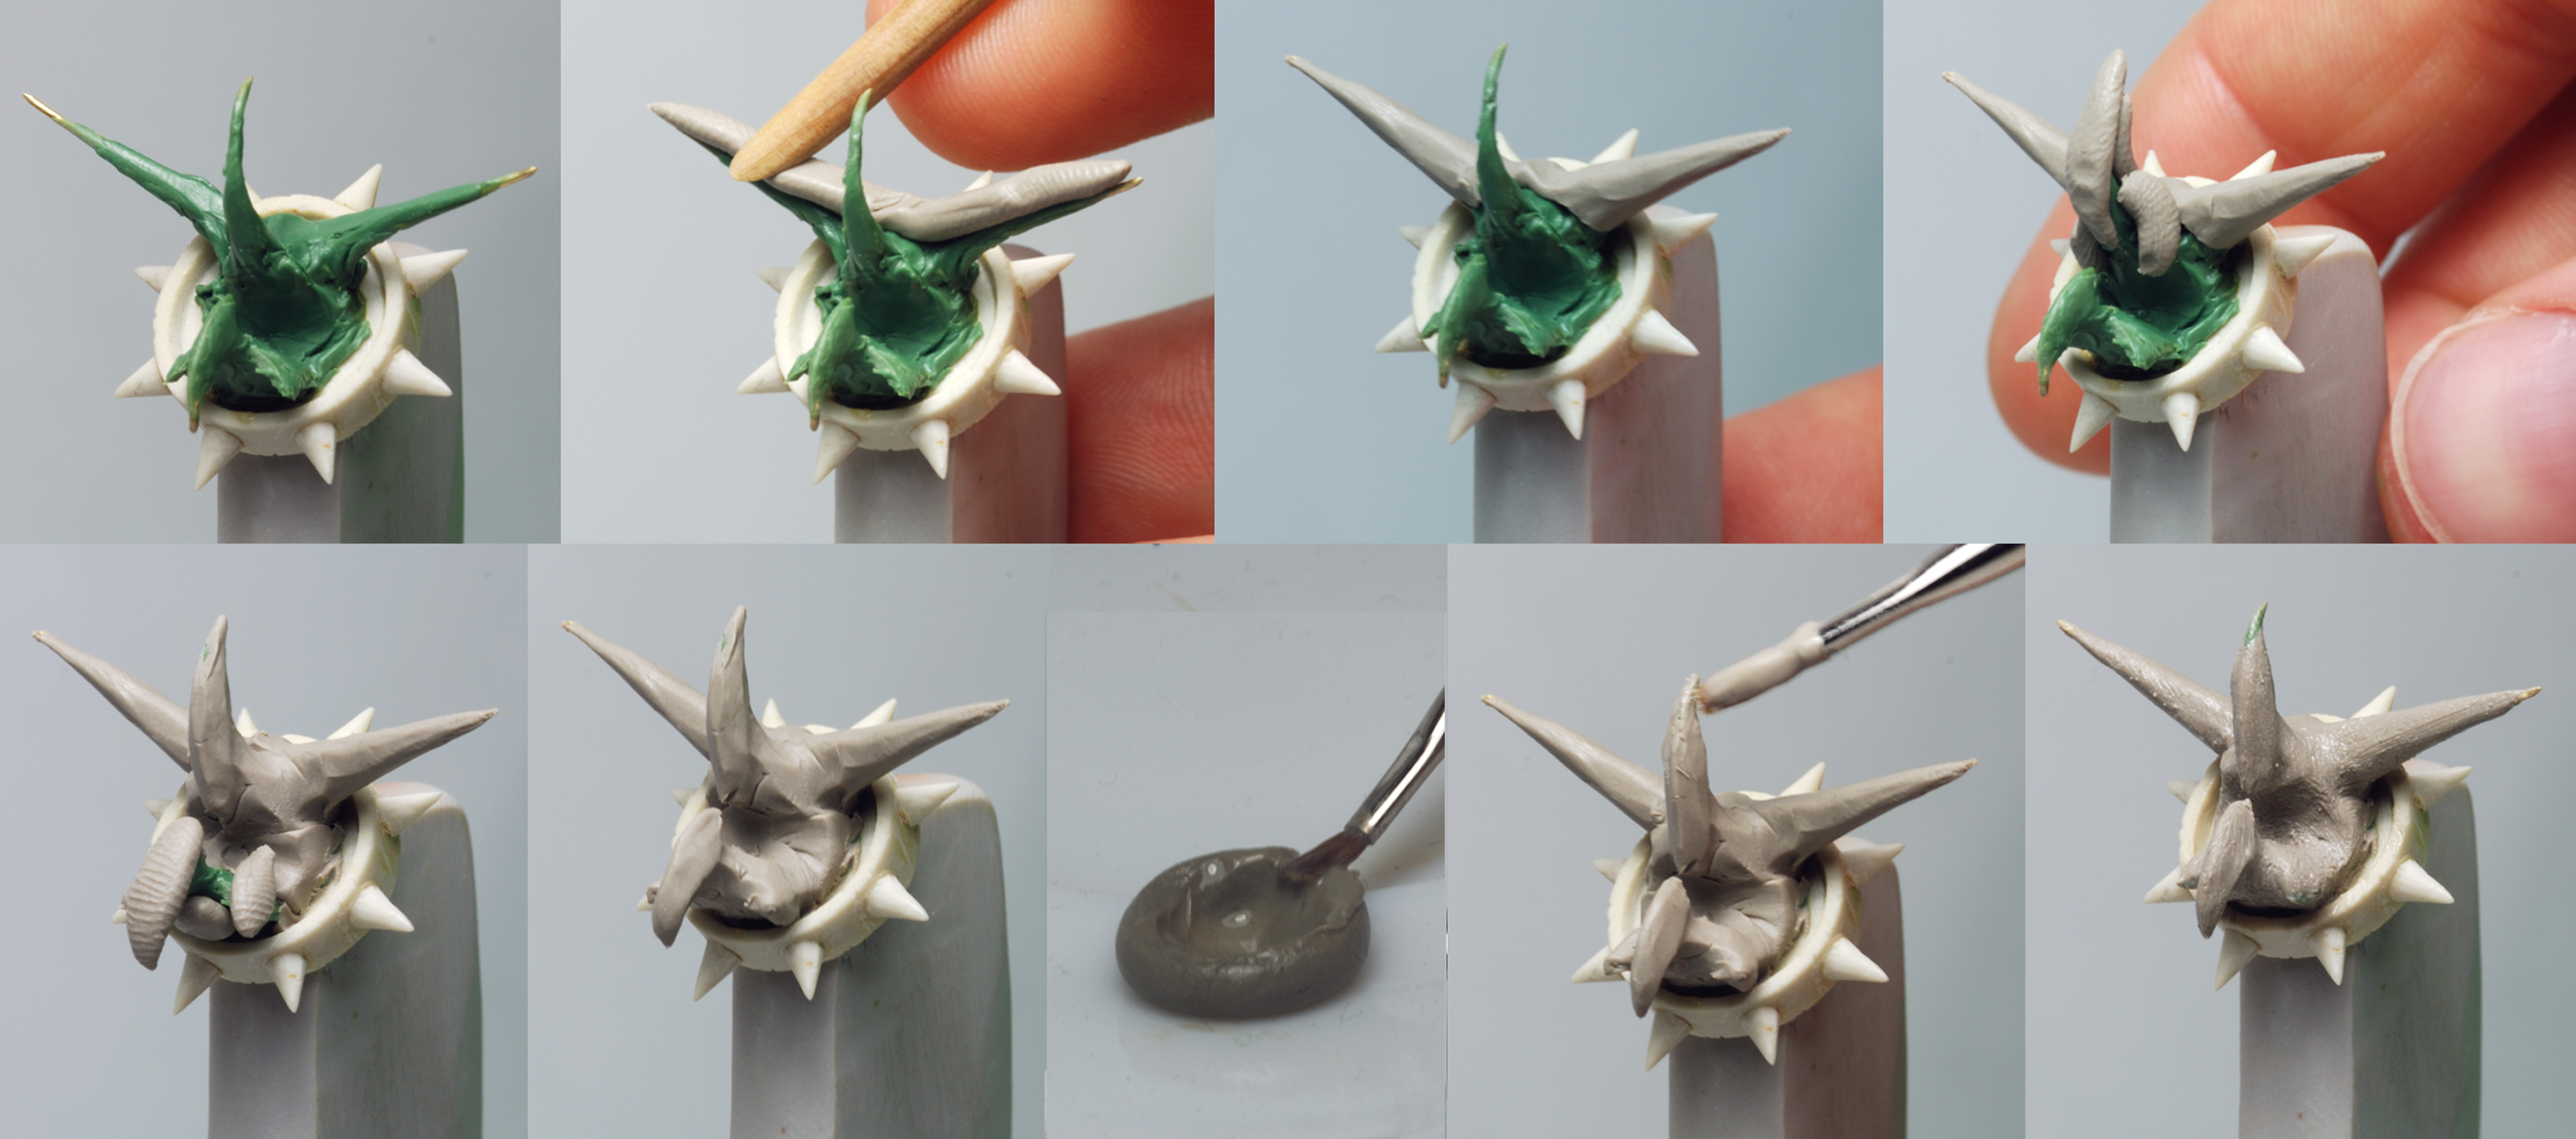
First we spread a thin layer of sticky duro, then a layer of Fimo (70% classic, 10% mixquick, 20%soft). To smooth and unify the whole thing, we wash turpentine (or white spirit) over it with a brush. It also helps the clay to sticjk at the tip of the horns, since the duro doesn’t go there to preserve the sharpness of the tip. We then leave it all to wait, until the solvent evaporates.
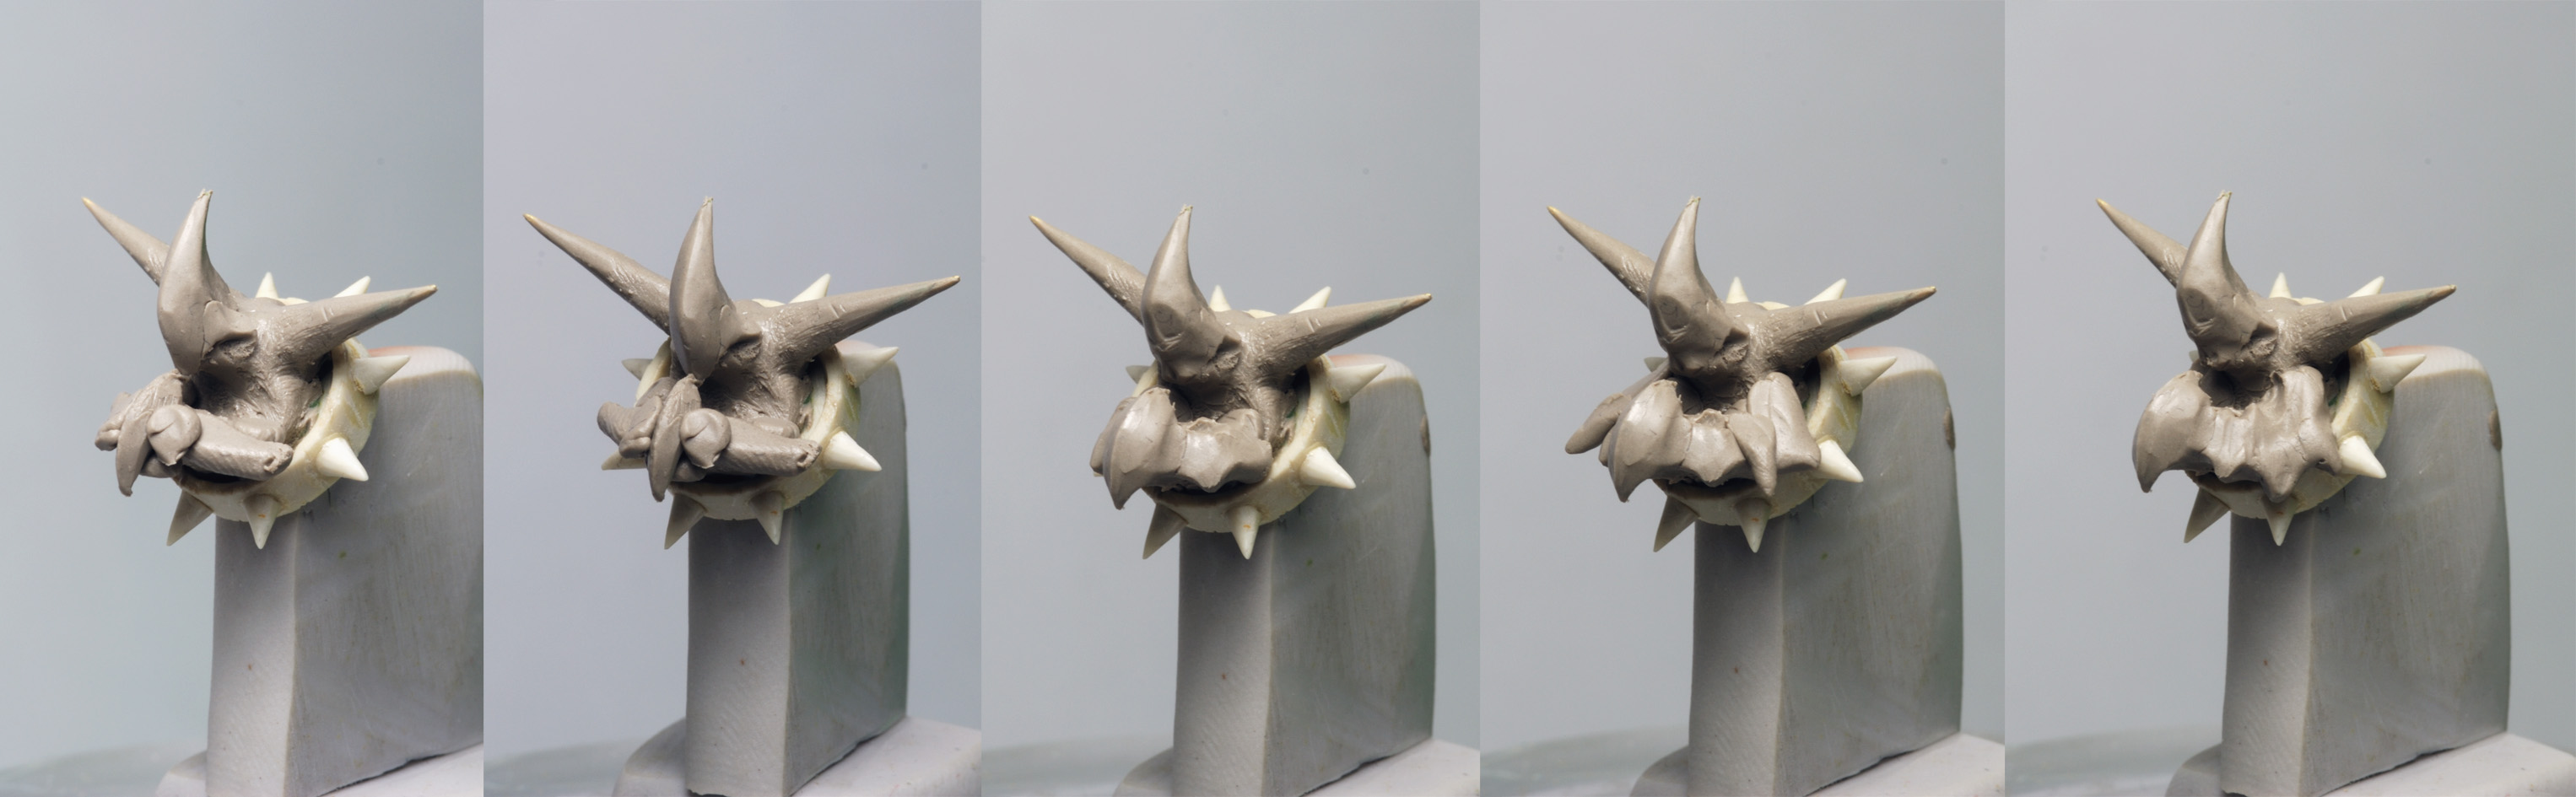
It’s time to add real masses: we begin by the lower jaw and the nasal horn. We put a sausage of Fimo that we gradually blend with a metal or wooden spatula. A stiffer tool allows to integrate more quickly the addition into the existing mass. We work on both sides at the same time, by adding cylinders of equivalent size, this allows to control global symmetry. It is often simpler to progress from the “center” of the mini towards the outside. Also giving the good shape to very visible and structuring parts of the model (here the nasal horn) can help to start well.
We then go on with the upper jaw, cheekbones and nose.
Two big sausages and three balls build the brow, skull and side horns. There again we work symmetrically, without getting carried away, and concentrate on the masses.
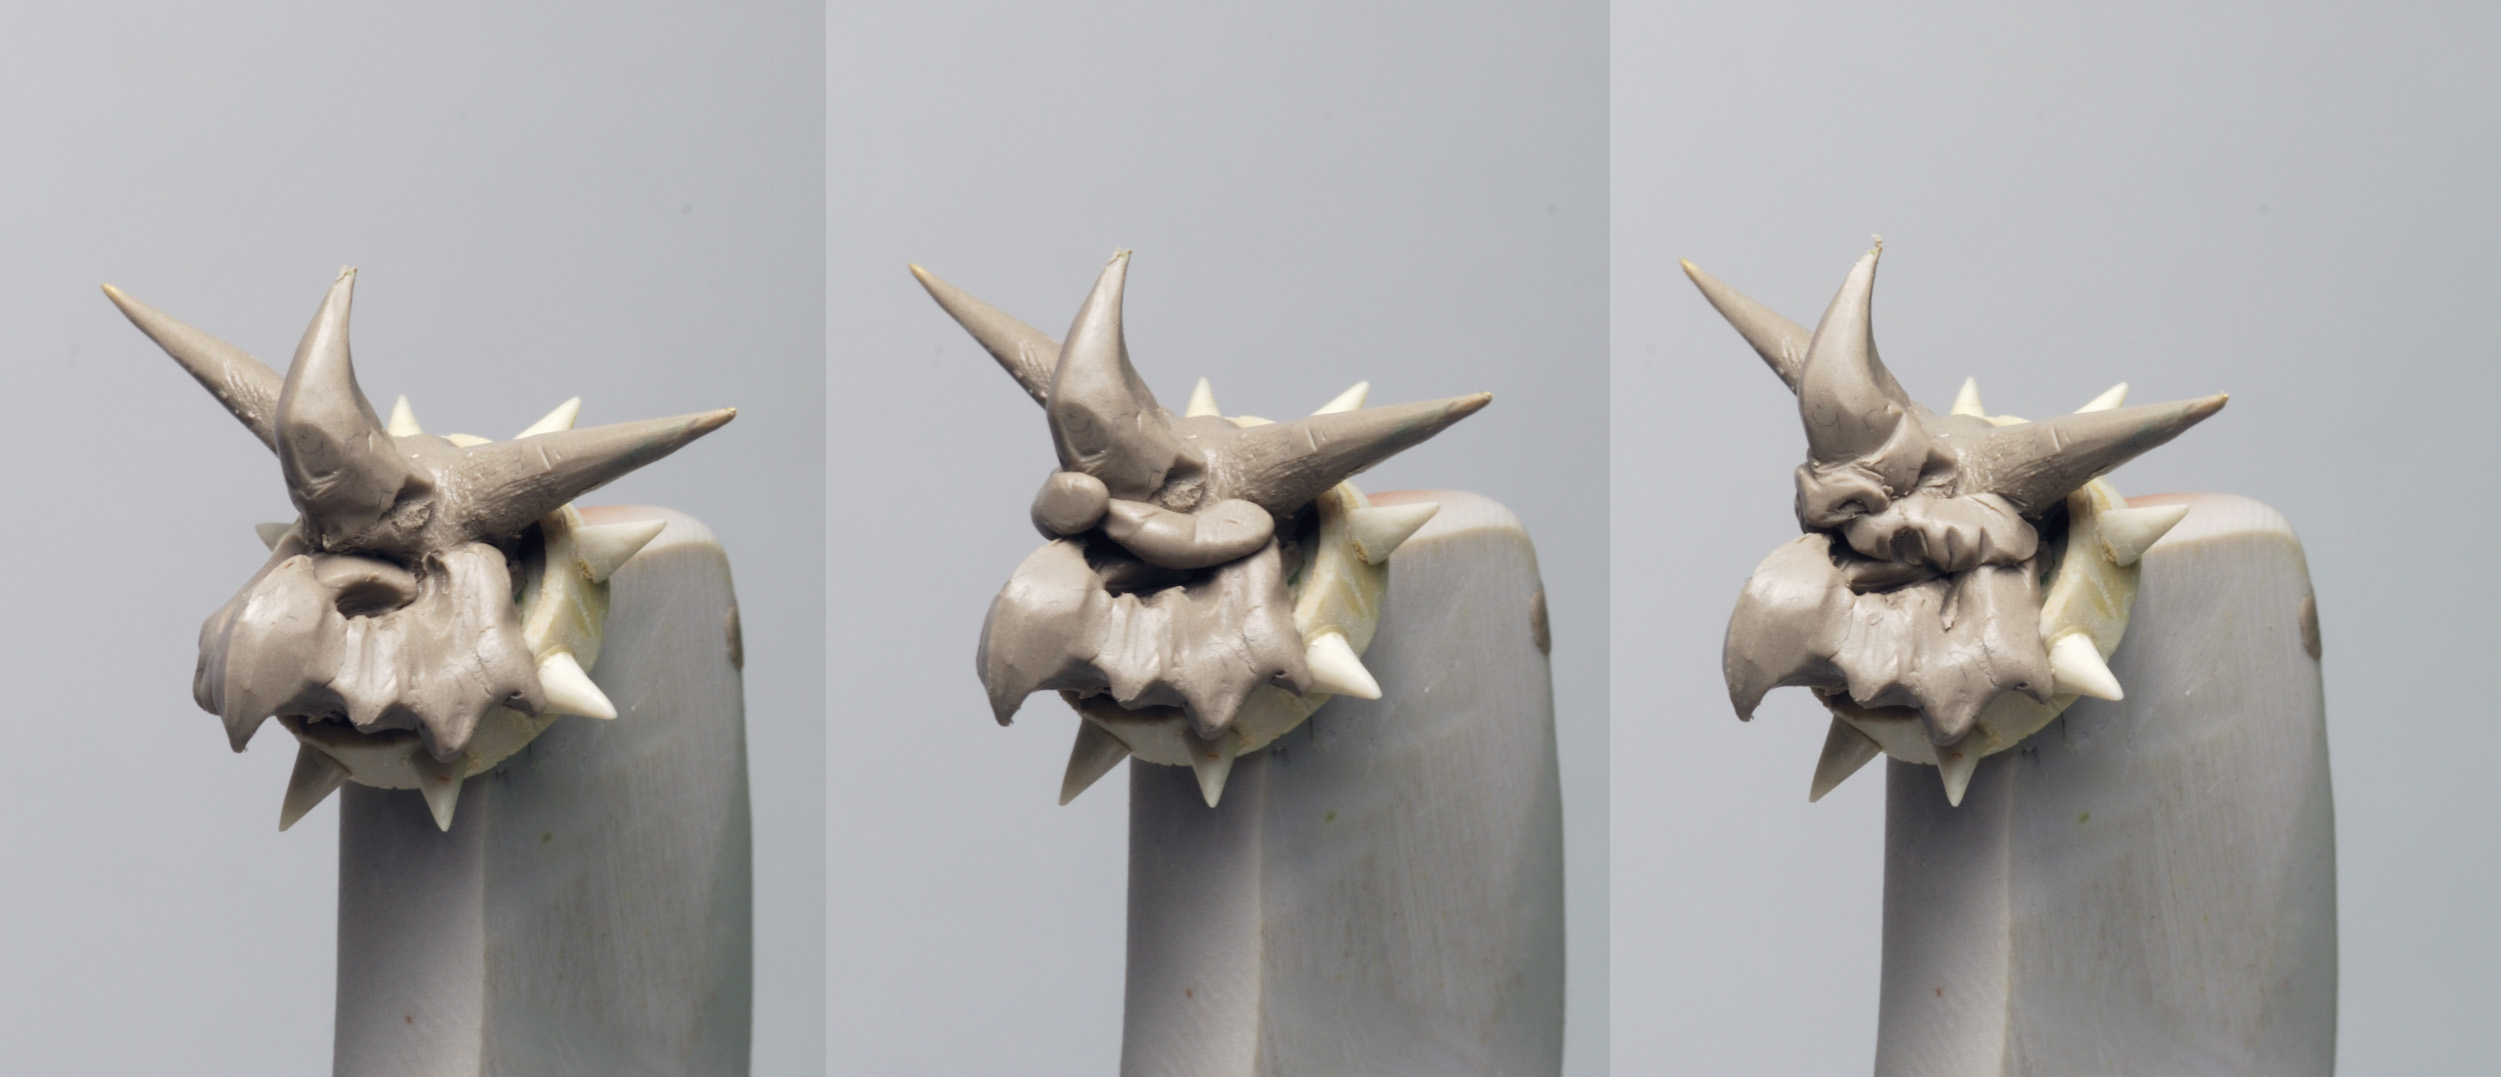
Detailing
By successive additions, we precise the main masses: jaws, brow, cheekbones, skull, horns, then the secondary masses: eyes, ears, teeth and veins, folds, buttons, etc. A good technique consists in turning the model to check the symmetry of the masses: a difference which you didn’tt see in the first place can be quite obvious once the model is upside down. In the same way, we can also look at it from below or above, in particular to compare cheekbones and brow.
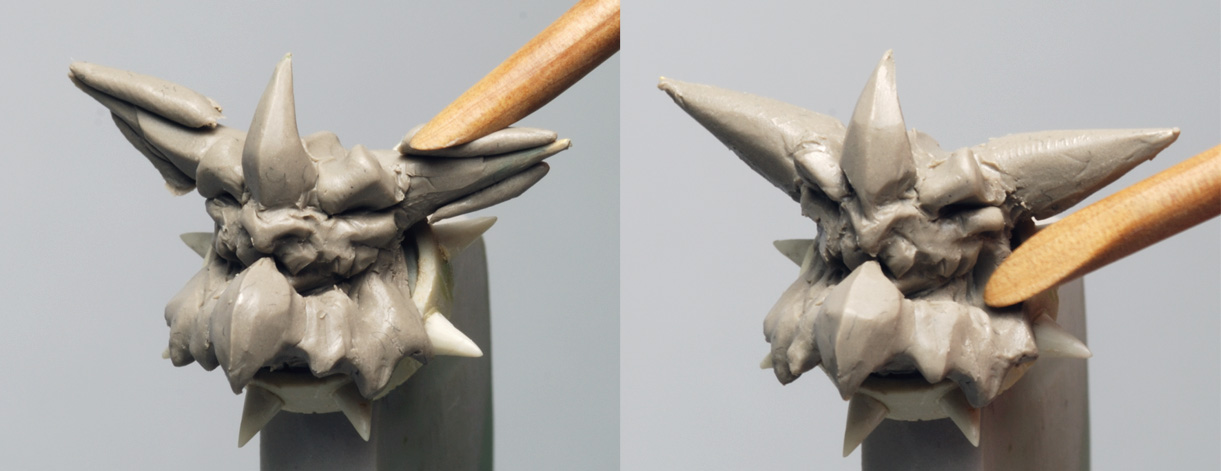
We first thicken the horns to stick to the drawing, then work on the shape of the jaws and the position of the teeth, as well as the opening of the mouth.
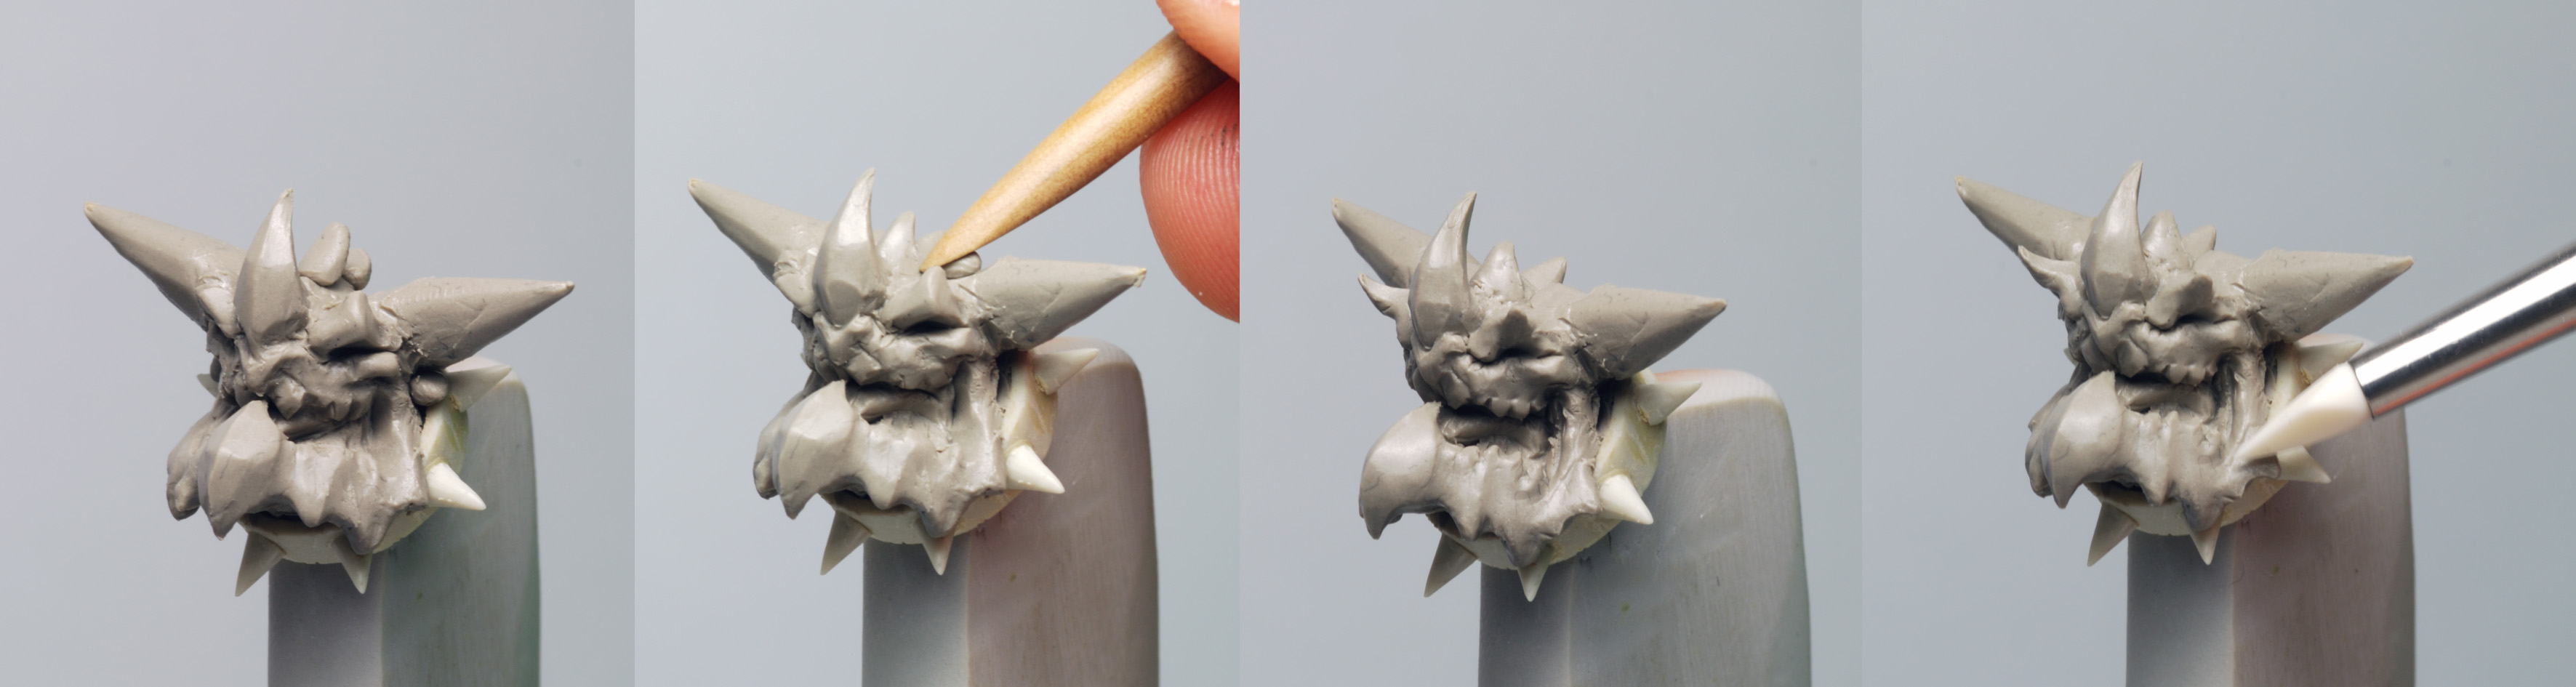
We go on with the shape of the « nose » and brow. Here and there we begin to smooth areas with a clay-shaper, to ease the reading of the shapes.
We continue to refine the general shape, we add in particular a few folds at the collar junction. Some more smoothing with a clay-shaper, and we add the eyes: a ball in each orbit, which we shape with a more precise tool. The ball becomes the eyeball plus the eyelids.
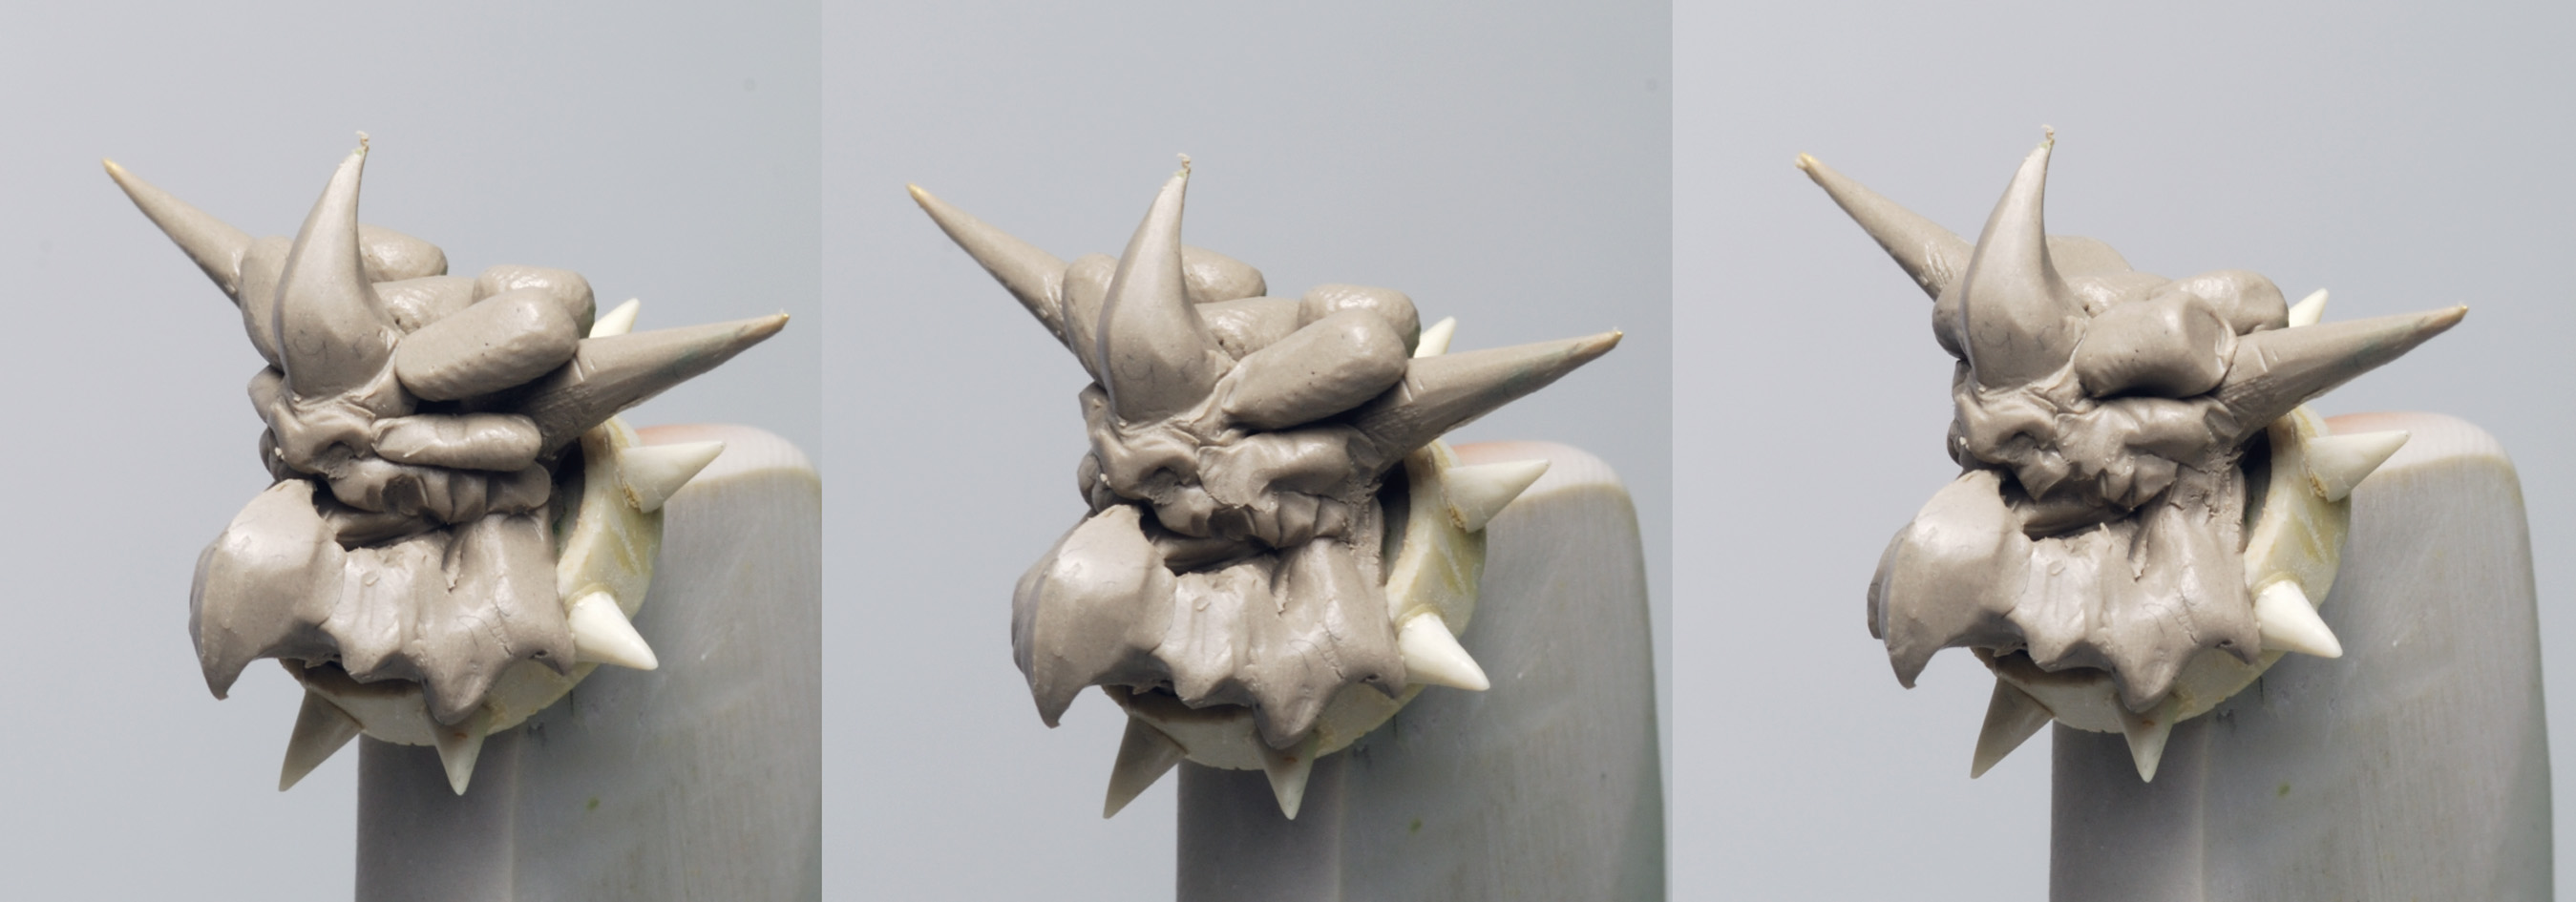
More detail
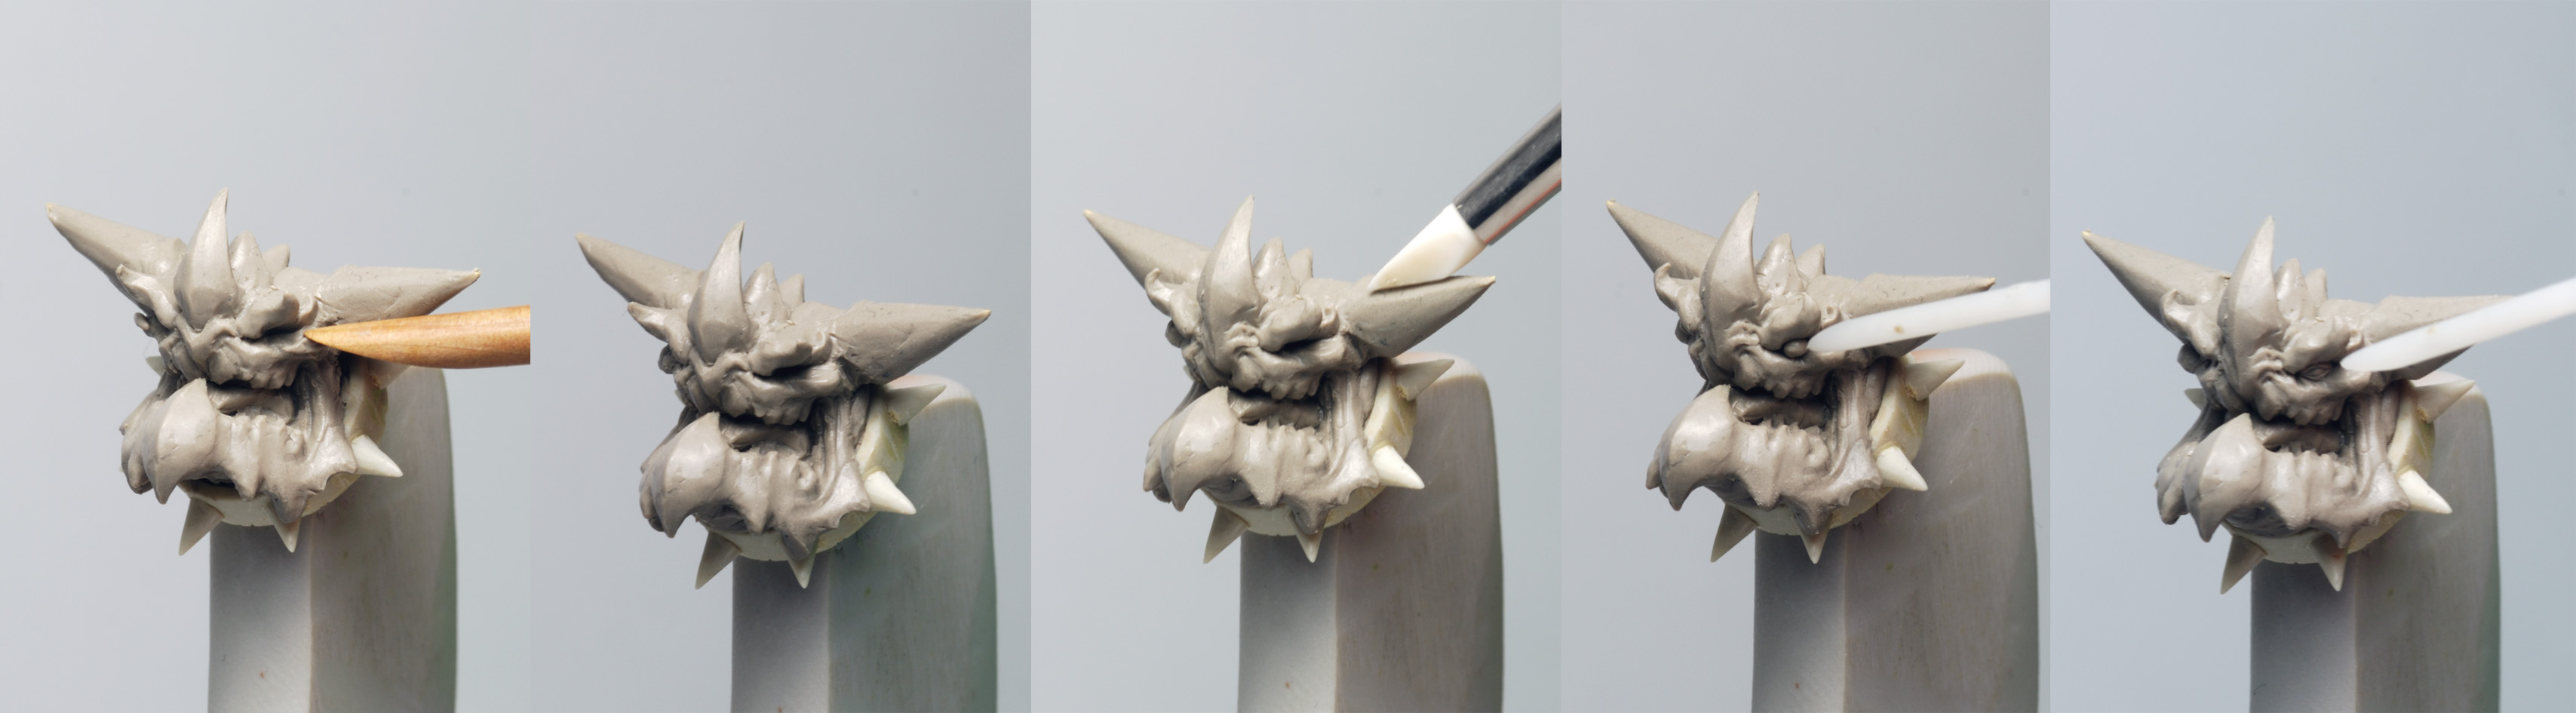
Everything is there, or almost. We now give more detail to the surfaces, and give each part the appropriate texture.
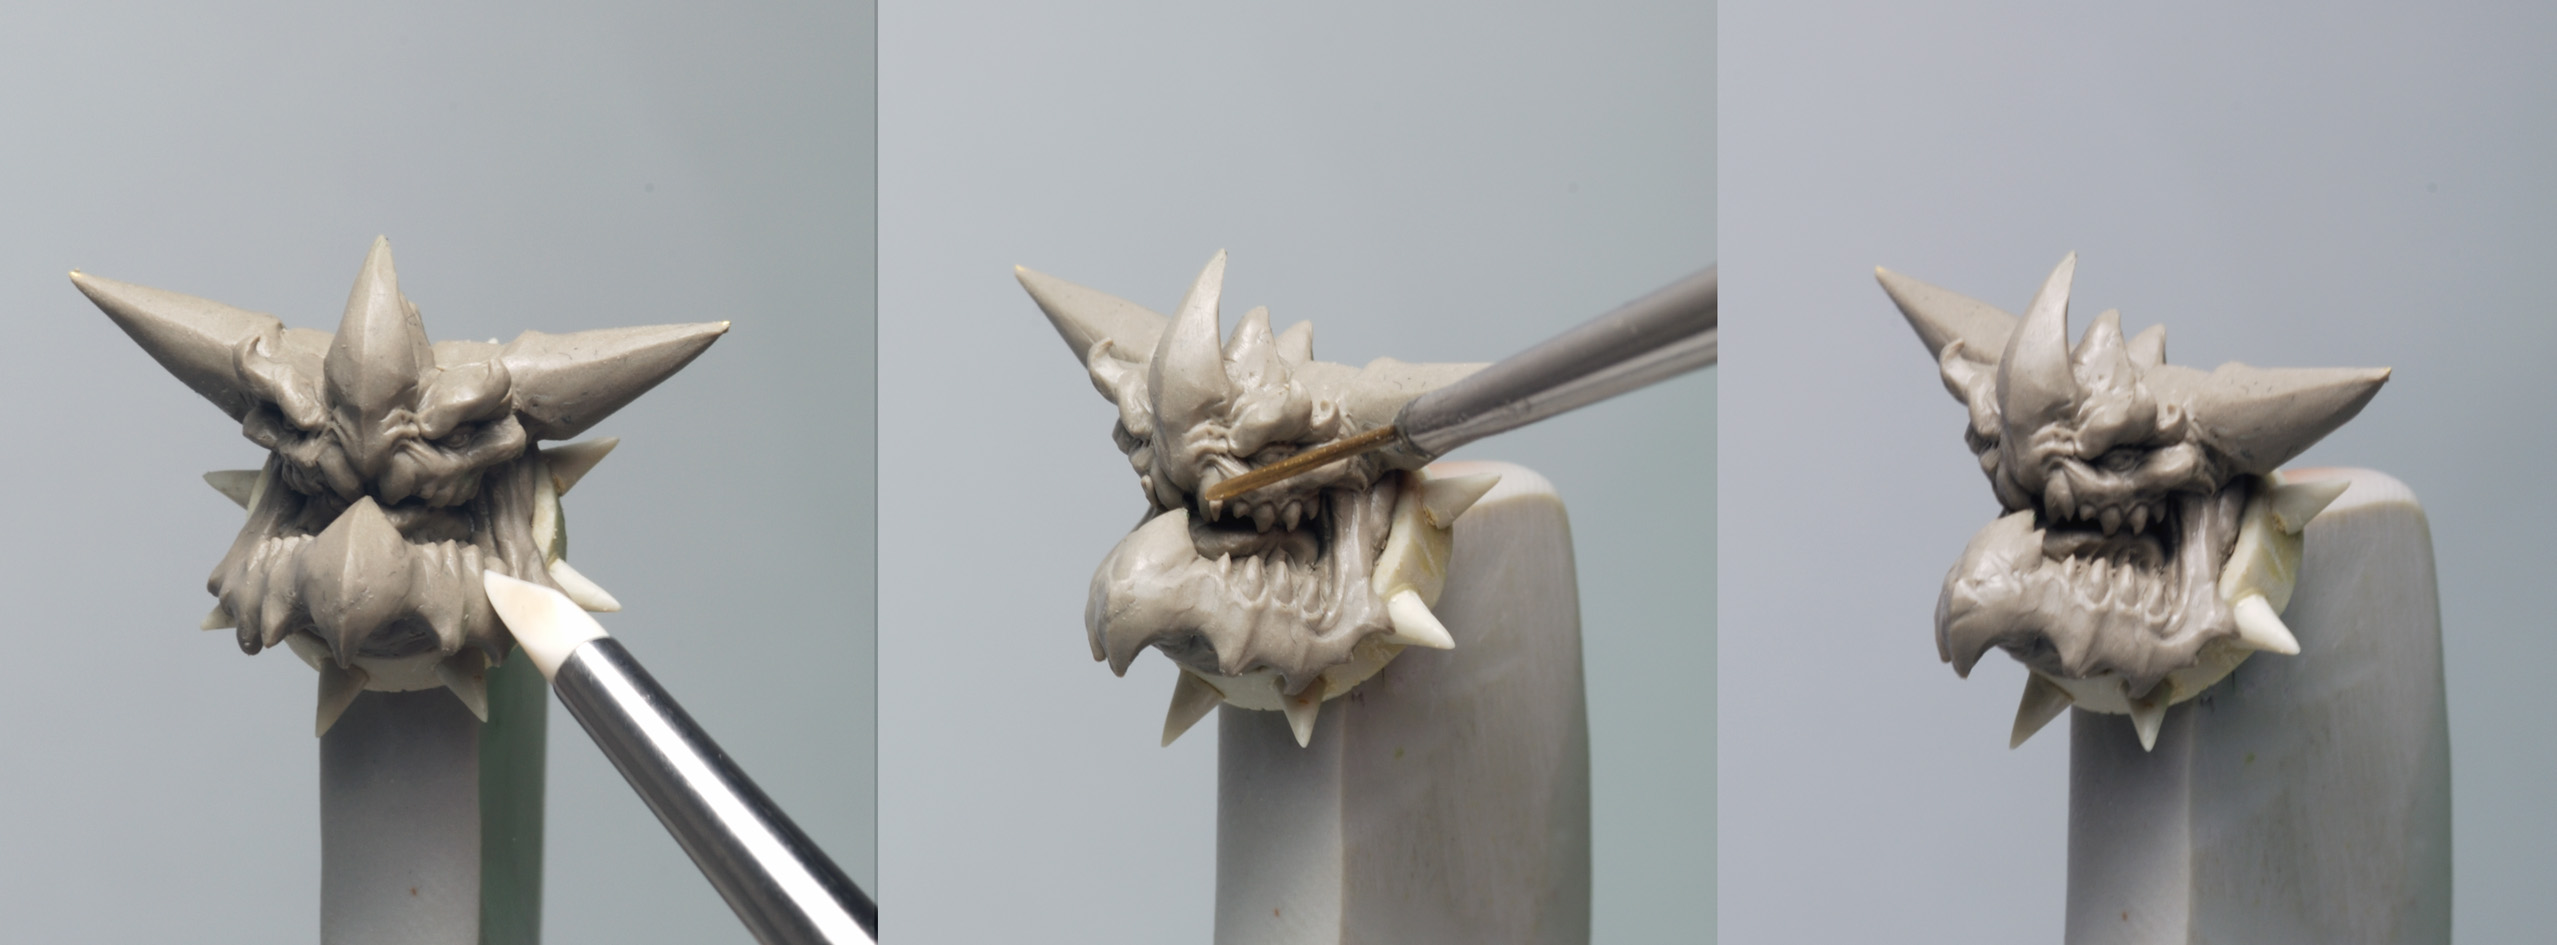
Again, with a clay-shaper, we keep on smoothing and get back on the eyes, eyelids and folds around, then we detail the wrinkles and teeth with a needle.

With the same tools I add on the skin little wrinkles and lines that follow the folds and the expression, then I texture the horns and lower jaw gradually going fromskin to horn, between crocodile skin and lobster armour.
The piece is done, it goes in the oven for a first time, 125° Celsius, 25 minutes, before making a few last corrections, especially on the sharp angles if they need a little scalpel refining. Final baking at 160° Celsius for 35 minutes. Finally the model is placed on a presentation base made of magic sculp, and ready for paint…!
Or perhaps I should cast it first… would be an idea right?
By the way, you can now buy this miniature at miniaturefactory.net !